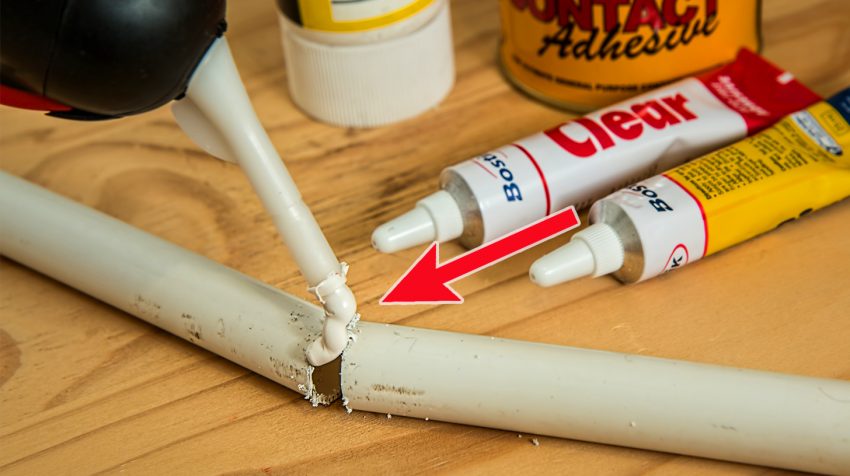
Когда вы начинаете любую работу, связанную со склеиванием, первое, о чём стоит подумать, это не выбор клея, как может показаться на первый взгляд. Важнее другое, насколько тщательно вы подготовите поверхность. Обезжиривание — это важный этап, который часто игнорируют, а зря. Даже самый мощный клей не спасёт, если поверхность будет плохо очищена от жира. Представьте, что вы пытаетесь наклеить что-то на масляную пленку, и что в итоге? Это просто не сработает. Именно так ведёт себя клей на неочищенной поверхности. Но чем лучше всего обезжирить её? Давайте поразмышляем об этом.
Ошибки и что делать
Вы наверняка сталкивались с ситуацией, когда склеенный предмет через некоторое время просто разваливался. Клей просто не смог зацепиться за поверхность. А всё потому, что была допущена ошибка ещё на стадии подготовки. Жир, часто хоть и не виден глазу, но он создаёт на материале тонкий барьер. И тут самое главное понять, чем этот барьер убрать. Первое, что приходит в голову большинству — это какие-то растворители или специальные жидкости. И это правильно. Но вот какой растворитель выбрать? И тут стоит немного остановиться. Ведь разные материалы требуют разных подходов. Например, если вы работаете с металлом, то можно использовать одно средство, а вот если с пластиком или деревом, то совсем другое. Но всё это приходит с опытом.
Выбор средства
Когда речь заходит о металле, очевидным выбором становится ацетон. Его эффективность проверена временем: он быстро и качественно снимает жир с поверхности. Но вот тут стоит помнить об осторожности. Некоторые материалы могут не выдержать контакта с таким агрессивным средством. Например, пластик. Он просто может подплавиться и потерять свой первоначальный вид. Поэтому стоит внимательно подходить к выбору, ориентируясь на материал, с которым вы работаете.
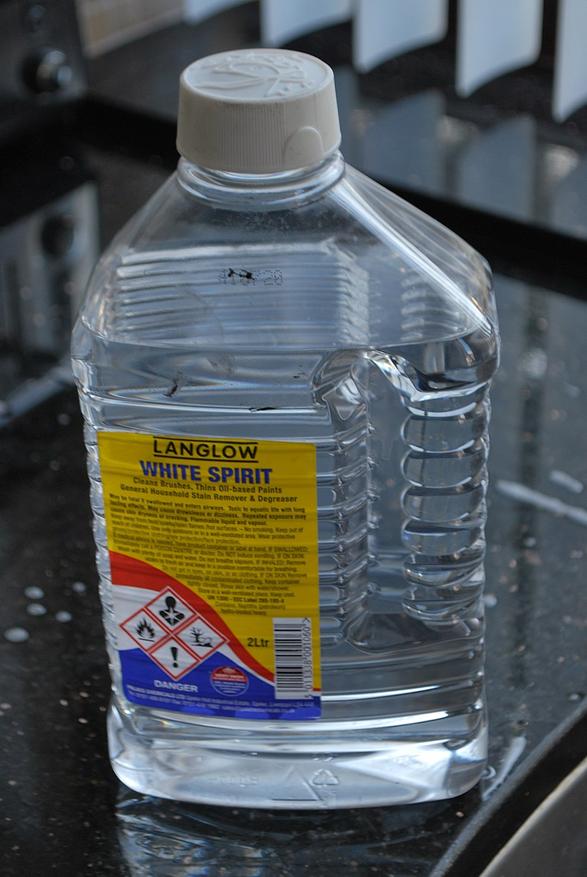
Но что, если под рукой нет ацетона? Вполне возможно, что у вас найдётся обычный спирт. Это не такое мощное средство, как ацетон, но всё же оно вполне справляется со своей задачей, особенно когда речь идёт о более деликатных поверхностях. Спирт достаточно универсален и не повредит большинство материалов. А если мы говорим о вещах, которые требуются для ремонта дома или автомобиля, это вполне рабочий вариант. Он не оставляет следов и быстро испаряется, что делает его удобным для большинства задач. Есть ещё одно хорошее средство, которое вы наверняка использовали — это уайт-спирит. Этот растворитель особенно полезен, если нужно очистить поверхности от масла или старой смазки. Особенно часто его используют при подготовке металлов перед покраской. Но и здесь есть свои нюансы. Уайт-спирит не испаряется так быстро, как ацетон или спирт, поэтому нужно дать поверхности немного высохнуть. Здесь главное не торопиться, потому что если приступить к работе раньше времени, результат может разочаровать.
Как подготовить поверхность
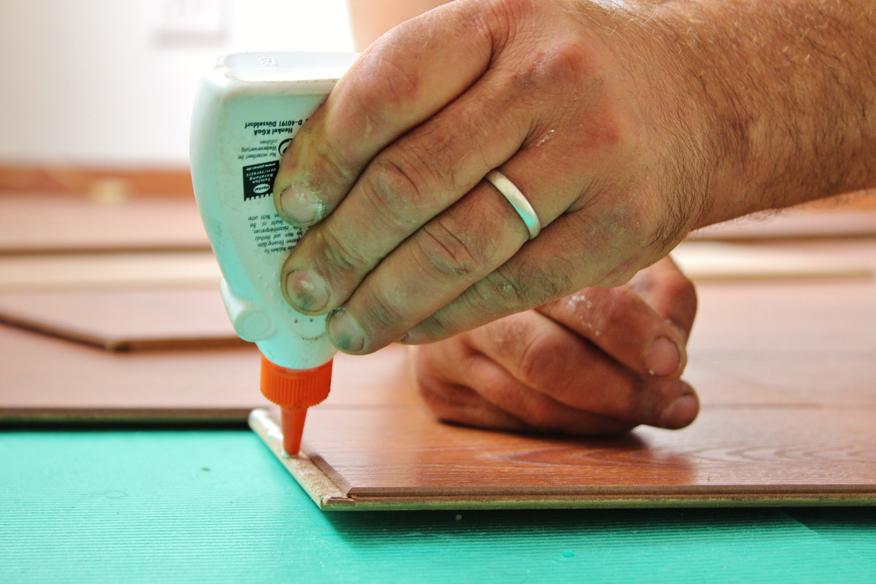
Вот ещё один момент, о котором многие не задумываются. Поверхность нужно не просто обезжирить, но сделать это правильно. Возьмите чистую тряпку, а не ту, что валялась где-то в углу гаража. Ведь если на тряпке остались следы масла или других загрязнений, вы только усугубите проблему. Используйте чистую ткань, чтобы результат был безупречным. Помните, что когда вы работаете с деревом или пористыми материалами, ситуация становится сложнее. Здесь простого растворителя может быть недостаточно. Дерево впитывает жир, и его удаление требует большего внимания. В таких случаях можно использовать специальные составы, предназначенные для работы с пористыми поверхностями. Они глубже проникают в структуру материала и вытесняют жир. Это особенно важно, если вы хотите, чтобы соединение было прочным и долговечным.
И вот тут возникает ещё один важный вопрос: как убедиться, что поверхность действительно обезжирена? Многие просто доверяют своим глазам, мол, раз выглядит чисто, то значит, всё в порядке. Но это далеко не всегда так. Бывает, что жир остаётся незаметным, и только после того, как клей не справляется с задачей, становится понятно, что не всё было сделано как надо. В идеале, после обезжиривания поверхность должна быть сухой и матовой на вид. Если есть хоть малейший блеск или ощущение липкости, то работу нужно продолжать. Есть ещё одна хитрость, которой пользуются опытные мастера. Обезжирив поверхность, они оставляют её на несколько минут, чтобы убедиться, что всё высохло и растворитель полностью испарился. После этого можно приступать к склеиванию. Этот простой шаг гарантирует, что на поверхности не осталось влаги или остатков жира, которые могли бы помешать.
Итого
Чтобы правильно обезжирить поверхность нужно учесть множества факторов: от того, с каким материалом вы работаете, насколько поверхность загрязнена и какой клей вы планируете использовать. Но одно можно сказать точно, что правильное обезжиривание — это залог успешного и прочного соединения. И если подойти к этому делу с умом, результат будет радовать вас ещё долго.
Изображение в превью: